Monitoring suite
Integration guide
To keep implementation as simple as we can, we only offer a single API endpoint. In this guide we'll go through all the steps needed to start logging events in AppMon.
Creating an App
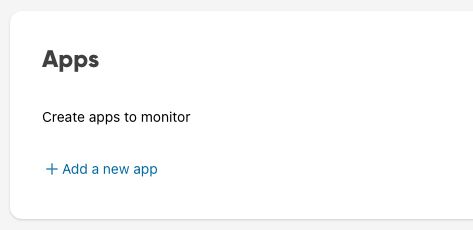
All events are grouped under apps, so we need to start by creating one. To do this, got to the Apps screen and tap "Add a new App".
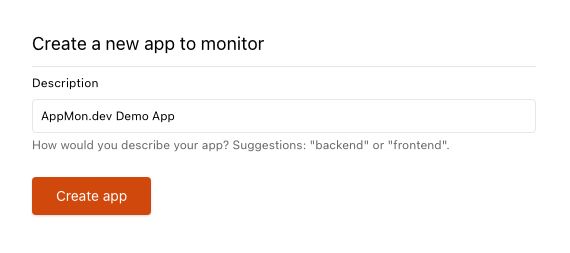
You can then specify a name for the app. In this example we've chosen "AppMon.dev Demo App".
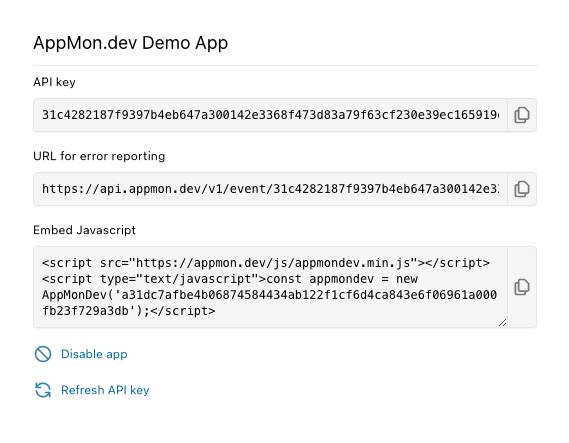
Now the app has been created! We can now copy the API Key or the URL for the event endpoint, which already includes the API Key in the path.
Embed Javascript
To add AppMon.dev logging to your frontend apps you can copy the embed code from the App config and paste that into the HTML for each page. This will then automatically log any unhandled error into our backend. No custom Javascript needed!
<script src="https://appmon.dev/js/appmondev.min.js"></script>
<script type="text/javascript">const appmondev = new AppMonDev('31c4282187f9397b4eb647a300142e3368f473d83a79f63cf230e39ec165919d');</script>
(Example embed code, please be sure to copy the actual value from the Configure dialog for your App before using it)
Authentication for backend and other apps
By far the easiest way to handle authentication is to send the POST requests to the exact URL copied from the App configure dialog.
(Example URL, please be sure to copy the actual value from the Configure dialog for your App before using it)
Alternatively, you can copy the API Key and use that as a standard Bearer Token. That will prevent the API Key from showing up in any error logs.
(Example header, please be sure to copy the actual token value from the Configure dialog for your App before using it)
This API Key is extremely limited in its uses. It can only be used to post events. All forms of account management must be handled through our own interface on this website.
Creating Events
We offer a single API endpoint to send events to the AppMon.dev API.
The bare minimum of a request to the event endpoint is as follows:
POST https://api.appmon.dev/v1/event/31c4282187f9397b4eb647a300142e3368f473d83a79f63cf230e39ec165919d
{
    "message": "My first event"
}
This will create a simple Event with severy INFORMATIONAL. This can be sufficient to start with.
A more detailed Event, including a custom label can be created like this:
POST https://api.appmon.dev/v1/event/31c4282187f9397b4eb647a300142e3368f473d83a79f63cf230e39ec165919d
{
    "message": "Unhandled exception",
    "script": "main.js:31:53",
    "severity": "ERROR",
    "uuid": "6fb78380-6b0a-495c-b4b6-8ced489f6471",
    "version": "1.0.0",
    "label": {
        "custom_label": "line 31"
    }
}
A full specification of all the available fields and their types:
Field name
Type
Description
message
(required)
string
The message to log. This is completely free form and will be indexed for search.
script
string
The name of the script or URL/URI which triggered the event. This is intended to make it easier to find out where the event was triggered.
severity
string
The severity level of the event. This is based on the severity levels used by syslog messages. If none is provided, it will default to INFORMATIONAL. Supported values:
- EMERGENCY
- ALERT
- CRITICAL
- ERROR
- WARNING
- NOTICE
- INFORMATIONAL
- DEBUG
uuid
string
A Version 4 UUID. May be used to group events or link them to specific users or sessions.
Example: 6fb78380-6b0a-495c-b4b6-8ced489f6471
Pattern: /^[a-f0-9]{8}-[a-f0-9]{4}-4[a-f0-9]{3}-[89ab][a-f0-9]{3}-[a-f0-9]{12}$/i
version
string
A version or commit hash to help identify the version of the code which triggered the event.
label
object
A free-form JSON object of keys and values. This can be used to add custom labels to events.
Example: {"custom_label": "line 31"}
Viewing Events
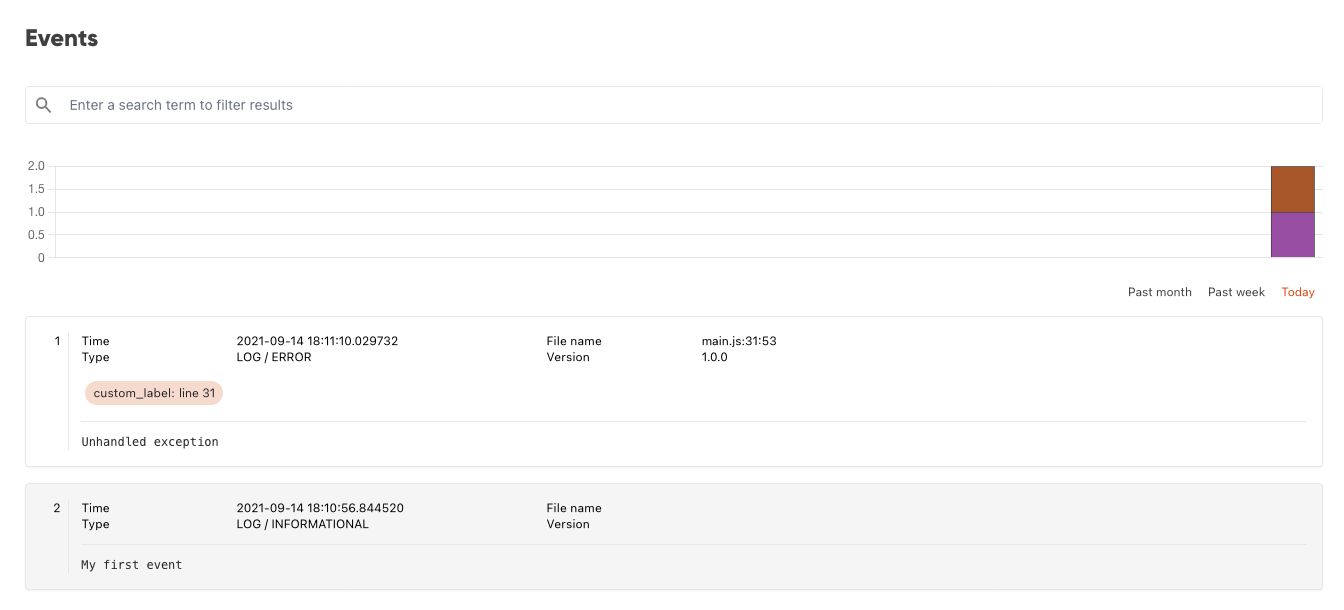
Now that the event has been posted, we can see it in the Event view on the dashboard.
Uptime monitoring
You want to know if your apps are online? Of course you do! But maybe you also want to be informed if some other sites you rely on go offline. With AppMon.dev you can monitor the uptime of not just your own sites, but also any external party.
Setting up an uptime monitor
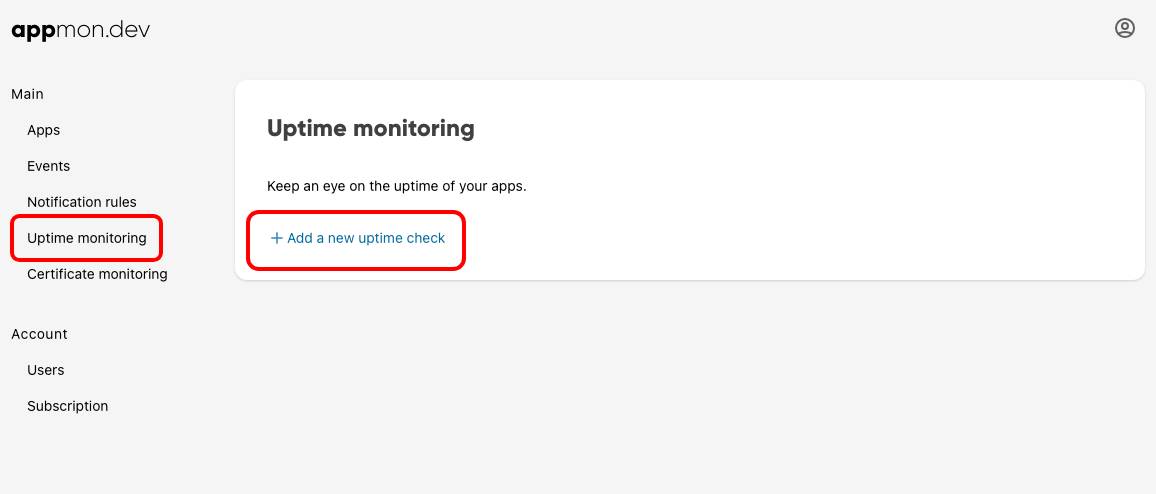
Your first uptime monitor can be added from the "Uptime monitoring" page. Just choose "Uptime monitoring" in the menu and select "Add a new uptime check" in the next screen.
In most cases, you will only need to enter a description and URL. This will then send a basic GET request to the provided URL at the chosen interval.
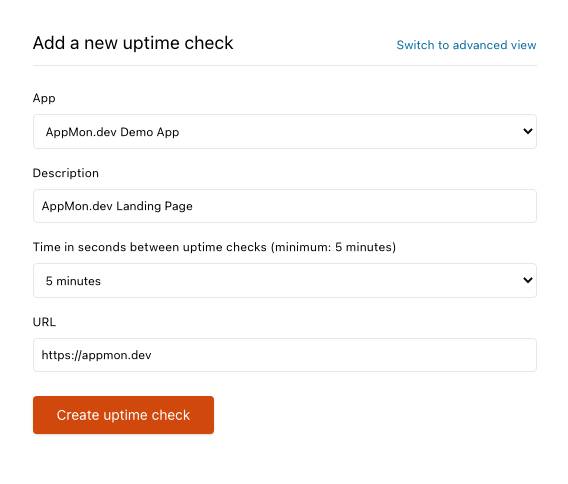
You can choose from the following intervals:
- 1 minute (only for our Team & Enterprise subscriptions)
- 5 minutes
- 15 minutes
- 60 minutes
- 24 hours
In case you require more advanced uptime monitoring, you can switch to the Advanced view using the button in the top right of the popup.
Here you can set up more advanced uptime monitoring, for example if you want to verify a POST /search API endpoint still responds with the expected message.
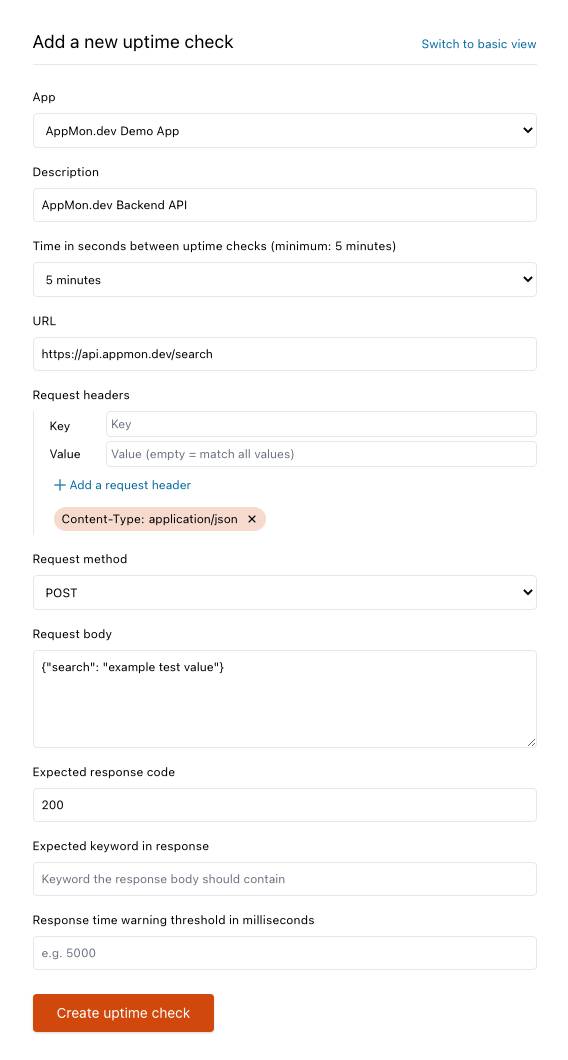
Now you can specify different request methods, or special request headers, provide a request body and even include keyword you expect the response to contain.
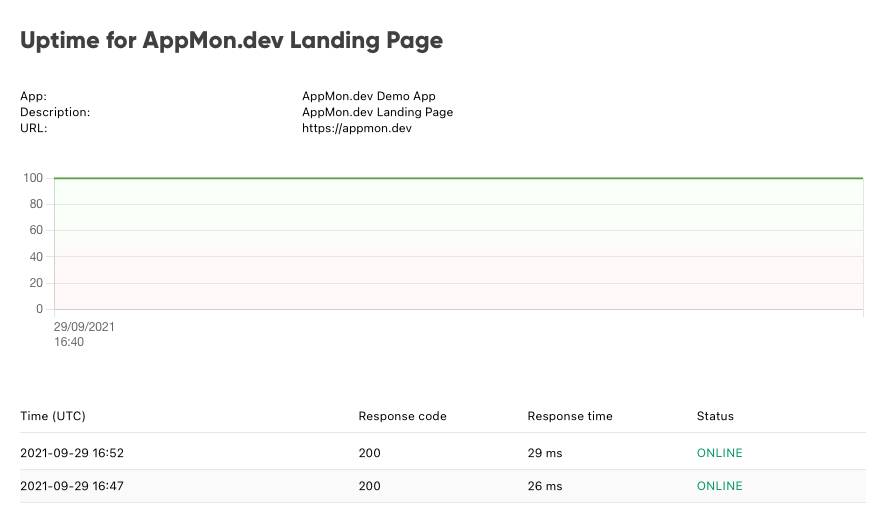
As soon as you've created it we will start polling the provided URL at the requested interval.
Uptime notifications
Being able to view uptime graphs is nice of course, but in case of downtime you want to know as soon as possible!
Don't worry, if we detect any downtime for any of your uptime monitors, we will automatically send an e-mail to all your users, as well as browser push notifications if enabled.
No additional setup required!
Certificate monitoring
Having valid certificates is important. However, certificates expire. Auto-renewal is great, but isn't always possible. AppMon.dev can help you keep an eye on your certificate expiration dates for you. Just link or upload a public certificate and we'll notify you a week before it's set to expire!
Setting up a certificate monitor
Your first certificate monitor can be added from the "Uptime certificate" page. Just choose "Certificate monitoring" in the menu and select "Add a new certificate to monitor" in the next screen.
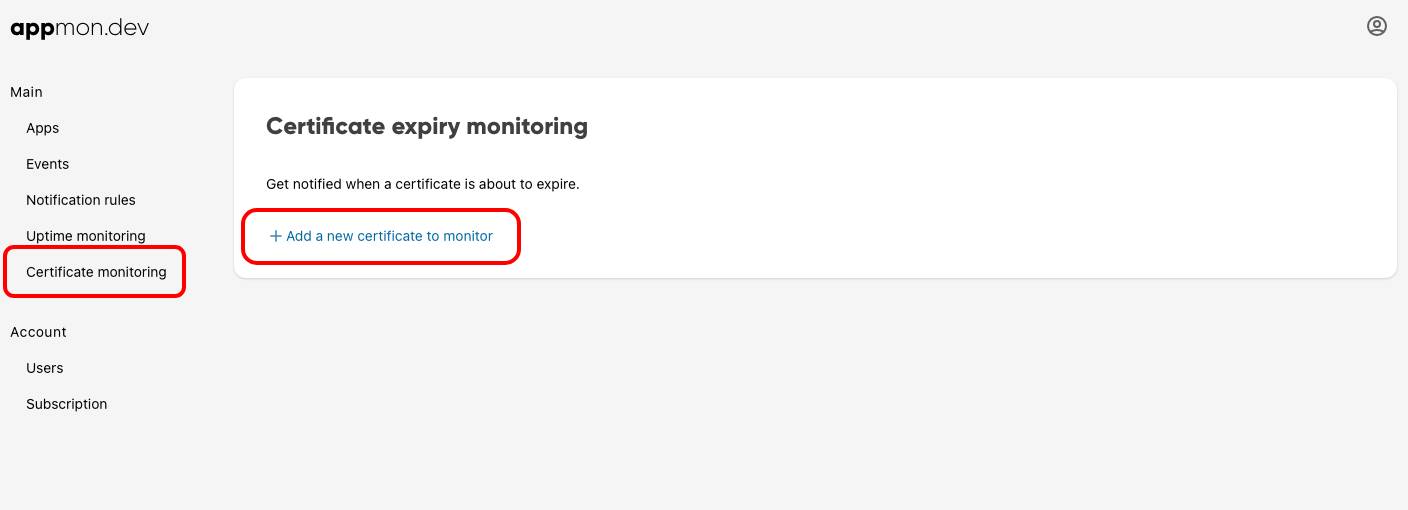
Enter a description and a URL pointing to the certificate, or upload the certificate yourself.

Once set up we will notify you 1 week and 1 day before the certificate is set to expire.
Notification rules
Using notification rules you can set up advanced notifications for different types events. You can ensure you get notified on errors or when an event contains a specific word or label.
Setting up a notification rule
Your first notification rule can be added in a similar way to the Uptime & Certificate monitors. Choose "Notification rules" in the menu and select "Add a new notification rule" in the next screen.
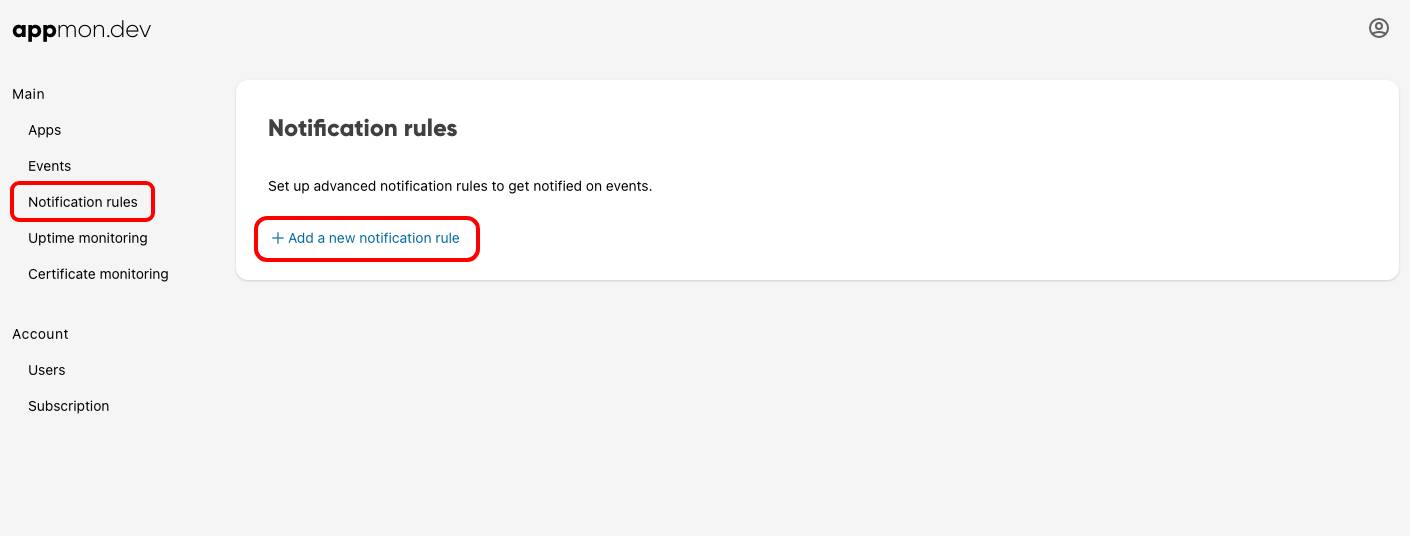
You will then get the dialog to add a new notification rule.
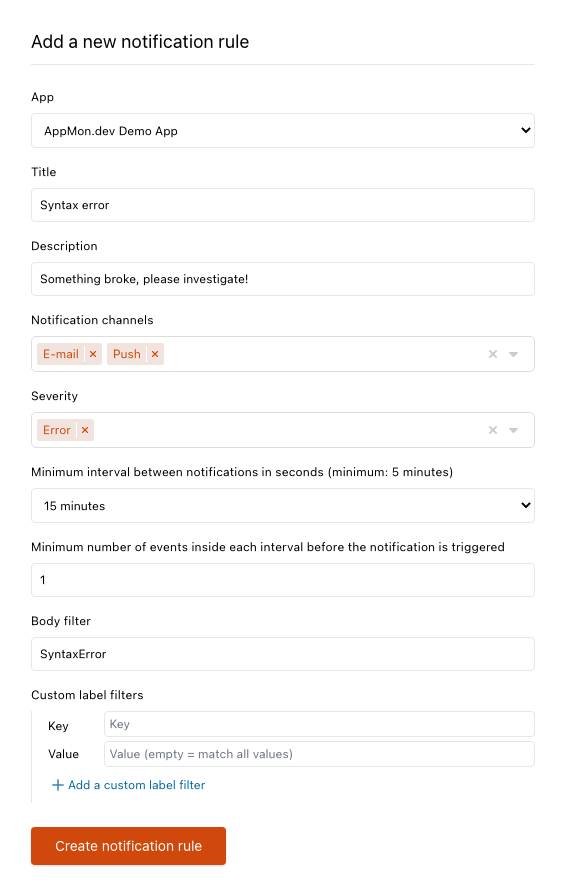
That's it! We hope you'll love using AppMon.dev as much as we loved building it.
If you have any questions or would like to discuss certain aspects, please check our support page.
© 2021 AppMon.dev